To import data from a data source to the design model:
1. On the My World ribbon, click Import ![]() .
.

2. From the Data Sources dropdown, select a data source and click OK.
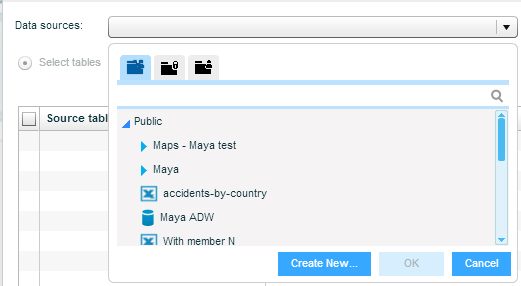
You can use the Public ![]() , Private
, Private ![]() or another user’s
or another user’s ![]() buttons to search for data sources in those folders. You can use the search box to search for a data source in a folder.
buttons to search for data sources in those folders. You can use the search box to search for a data source in a folder.
You can create a new data source directly from the Data Sources dialog box by clicking the Create New ![]() button.
button.
3. The names of the tables in the data source now display in the dialog box.
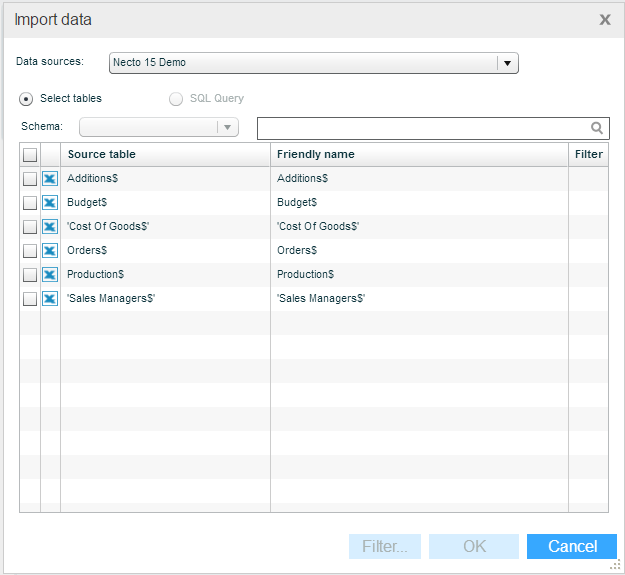
Select the tables you want to include in the model in one of the following ways:
· Select the check box of each table. If you want to use all the tables, select the check box next to the title Source table.
· Compose an SQL query for accessing specific information from this data source.
4. To filter the data of a selected table, click the table and then click the Filter ![]() button.
button.
5. If you’re importing from a relational data source, you can use the Find Related Tables option to automatically mark the tables related to the ones you have selected. Click the Find related tables ![]() button. Necto will connect to the database and check for existing relationships between the tables. It will automatically select the related tables.
button. Necto will connect to the database and check for existing relationships between the tables. It will automatically select the related tables.
6. Click OK. The selected data will now appear under My World.
To compose an SQL query for selecting data from a data source:
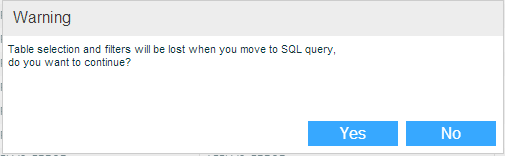
1. In the Import Data dialog box, select the SQL Query option, and confirm the warning message.
2. In Friendly Name, enter a name for the query. This will be the name of the data table you are creating for the model.

3. You can enter query text using copy and paste or through drag and drop: Drag and drop tables and fields from the database object tree into the query area and/or type the query manually.
4. After completing the query, click ![]() to test its validity. The query has to be compatible with the selected data source standard. The Message pane displays a validity message.
to test its validity. The query has to be compatible with the selected data source standard. The Message pane displays a validity message.
5. Click OK. The query results will appear under My World.
You can narrow the model’s data and make it more efficient by filtering the data source tables before importing them.
To filter the data of a table you have selected:
1. In the Import Data dialog box, select the table and click the Filter ![]() button.
button.
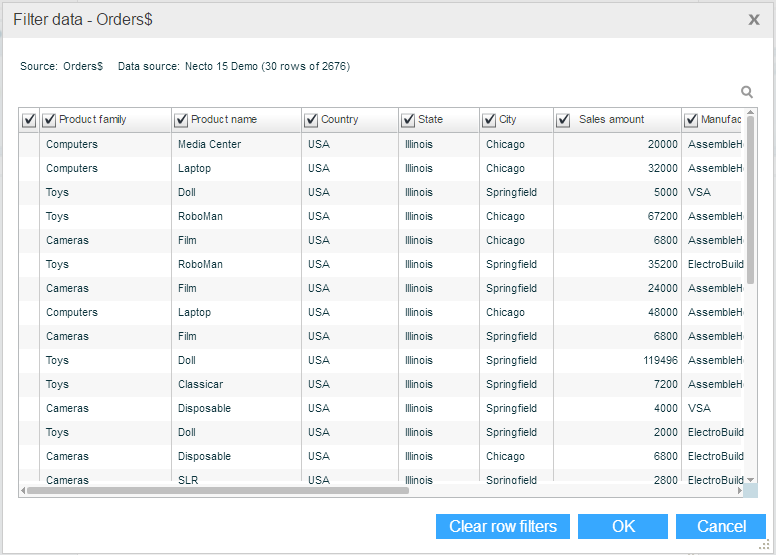
Use the search box at the top of the Filter Data dialog box to search for a field name.

2. Clear the check boxes of the fields you want to exclude. To deselect all the fields, clear the check box at the top-left corner.
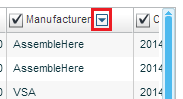
3. To select values for a field, click the arrow on the field title.
4. In Filter Type, select either Select Values (to filter by selected values) or From-To (to filter by a range of values).
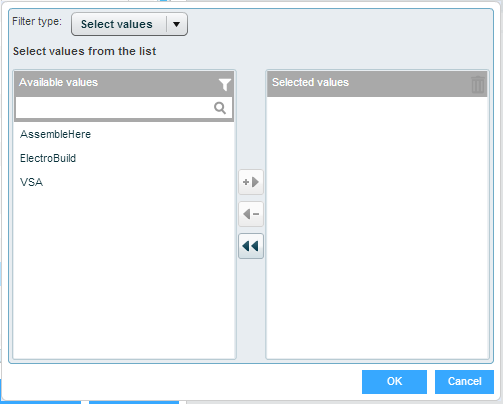
5. If you selected Select Values, move values from the Available Values panel to the Selected Values panel: Click on a value and then click the Add arrow.
6. If you selected From-To, define a range by selecting a value in From and another in To. If you want this range to be excluded from the model data, select the Exclude the selected range option.
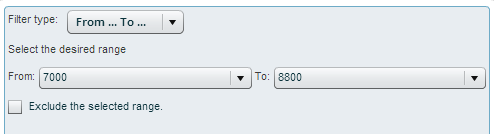
7. Click OK. A filter ![]() icon appears in the field title.
icon appears in the field title.
To remove a filter from a column:
Click the arrow on the field title to open the value selection dialog box. Click the Remove Filter ![]() button.
button.
To remove all filters:
Click the Clear Row Filters ![]() button.
button.