To create a workboard with data, activate the Workboard Wizard in one of the following ways:
· Click the New ![]() button on the Workboard page ribbon or on the Home page ribbon, and select the Create a Workboard with Data option.
button on the Workboard page ribbon or on the Home page ribbon, and select the Create a Workboard with Data option.
· On the Necto Home page, click on Create Workboard.

· In the Workboards Pane on the Workboard page, select New from a folder options menu. Then select the Create a Workboard with Data option.
Continue with the steps below:
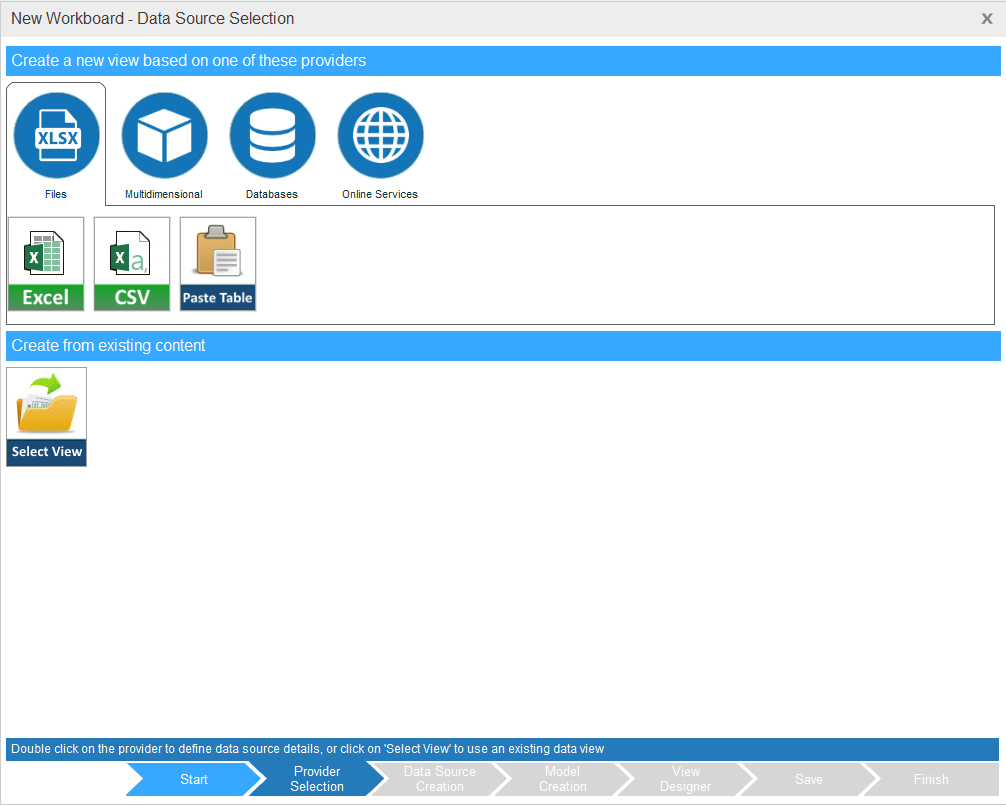
1. In the Provider Selection step:
· To work with data from an existing view, click Select View.
· To create a new view from a data source, select a provider type (e.g. Multidimensional) and then a data source type (e.g. Necto Model), and click Data Source Creation. Or, just double-click on the data source type to move to the Data Source Creation step.
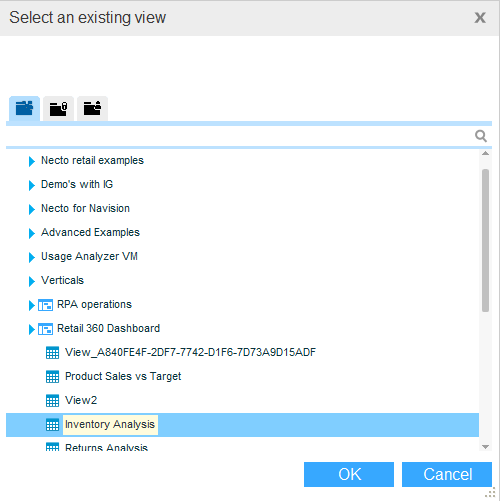
2. If you clicked Select View, use the buttons at the top to display the Public ![]() , Private
, Private ![]() or other user’s
or other user’s ![]() workboards. Expand the workboard where the view is located. Select the view and click OK.
workboards. Expand the workboard where the view is located. Select the view and click OK.
3. If you selected a data source and clicked Data Source Creation, this step will display settings that are relevant for the selected data source type. Enter the required settings.
The Paste Table option under XLSX Files in the Provider Selection step enables you to copy and paste a table, and use it as a data source.
4. Click View Designer (optional step).
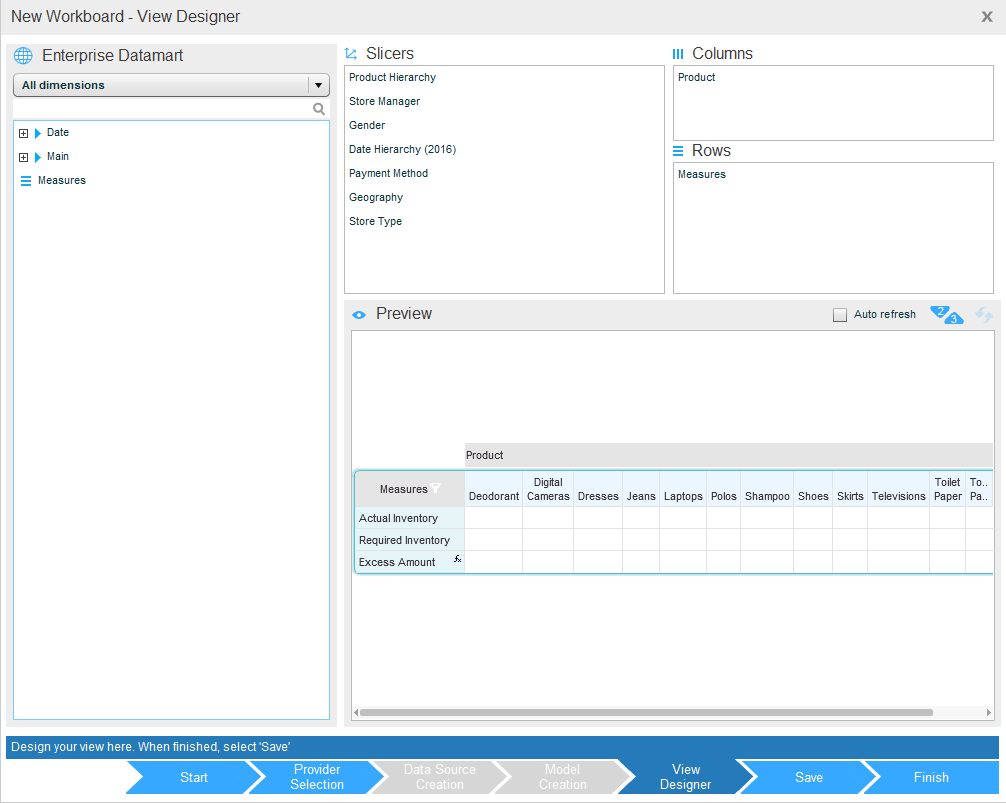
To use the options in this window, see Using the Dimensions Selector in a View Component.
5. Click Save.
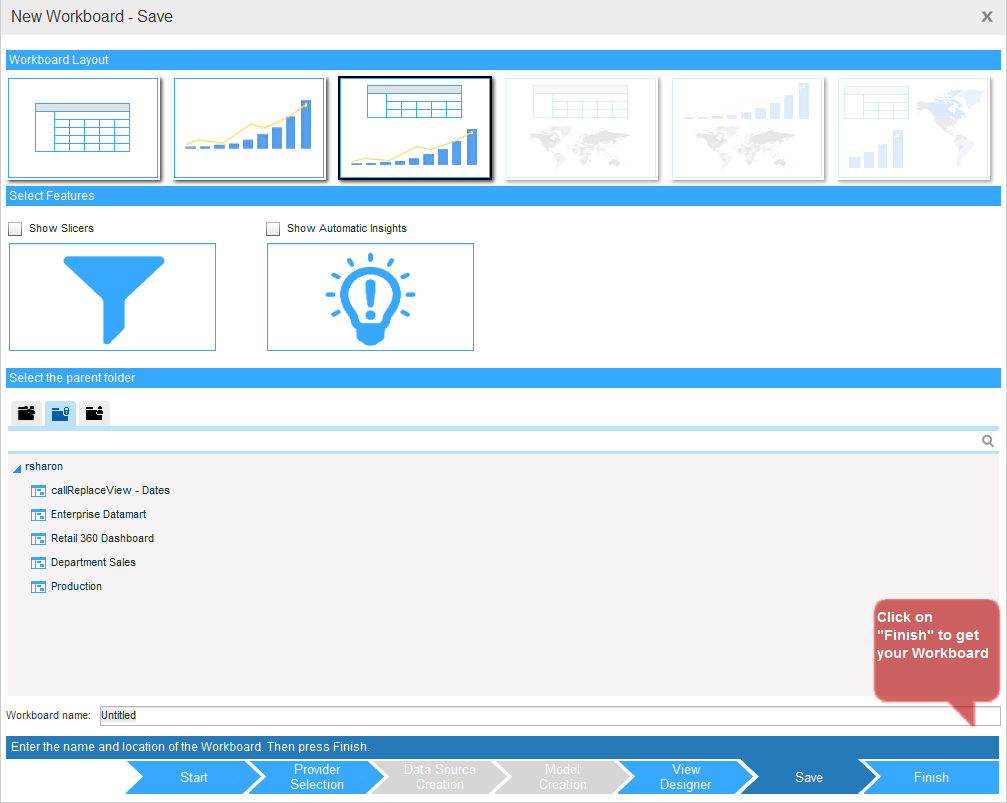
The data you selected can be presented in a view component with a grid, with a chart or with both elements. In the Workboard Layout pane, select a layout that contains the elements you want.
In the Select Features pane, select Show Slicers if you want the workboard to open the Slicers Pane. Select Show Automatic Insights to show the Quick Exceptions in the grid data.
In the folders pane, select the folder where you want to save the new workboard.
In Workboard Name, enter a name for the workboard.
6. Click Finish.